Just like the PFO puts on Tito Fest every year, now you can create your own carnival at home utilizing basic household items! There are many options for @Home carnivals, but below you'll find a few example/suggestions to get you started.
To add an extra layer to it all, you can print these "tickets" to hand out as children complete the games. Incorporate spare change or small prizes to get them really excited, or turn the tables and have the kids create their own prizes and run the carnival themselves, where the grownups are the participants!
To add an extra layer to it all, you can print these "tickets" to hand out as children complete the games. Incorporate spare change or small prizes to get them really excited, or turn the tables and have the kids create their own prizes and run the carnival themselves, where the grownups are the participants!
Can Toss
If you have canned goods at home, then you already have most of what you need to build can toss! Clean out the cans once they have been emptied, and ensure there are no sharp edges left from the lid. To make it more fun you can either paint the cans, wrap them in construction paper, or even decorate printer paper and then wrap that around as well! Find an object to toss at them (plastic balls or bean bags work pretty well), and you're all set!
Skee-Ball
|
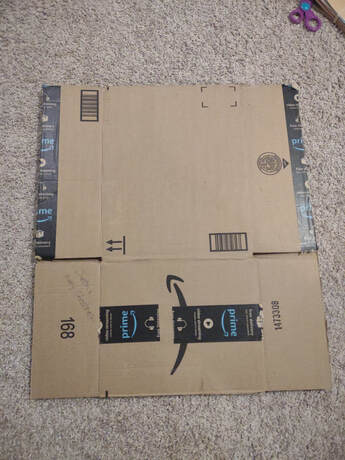
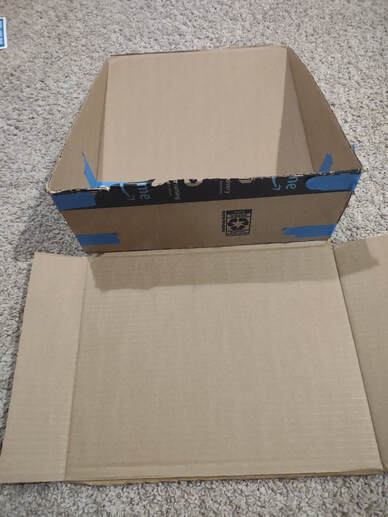
Grab a shopping box. the bigger the box the longer your ramp will be to roll the balls. Cut the box in half, leaving both a short and long side attached, as well as all the 'edges'.
|
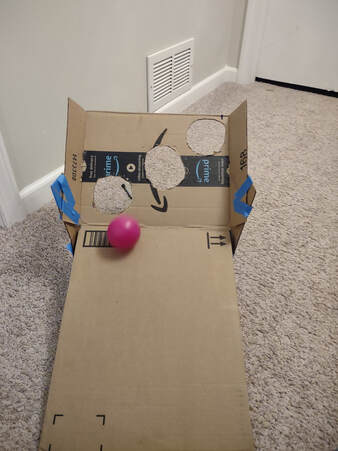
Next cut diagonally down the side 'edges', where you start away from the smaller flap and work your way up to the small flap. This will build your ramp. Cut another piece off the other half of the box that you put aside and use it to secure the triangle pieces together, forming a wedge.
|
Ball drop/toss
This one requires cardboard as well, but a cereal box works rather well here. Simply cut four strips of equal length out, then cut notches at the top of each one to end up with 3 equal lengths across each strip. Flip two of them over and slide the notches into place so the the pieces slide into each other and become "flat" at the top and bottom, creating a grid (or hashtag). Now Cut four more strips of the same height that go the length of the outside of the grid, creating a box or frame around the entire thing (if you had a shipping box you could also use that as your outer edges and simply cut the strips so that they nestle inside the box, making it even easier to assemble!). Tape as necessary to secure all the strips together, and you're done! use a ping pong ball or other smaller ball to try and get them into the squares - get even more creative and assign each square a point system so kids can aim for specific squares to get more points.


