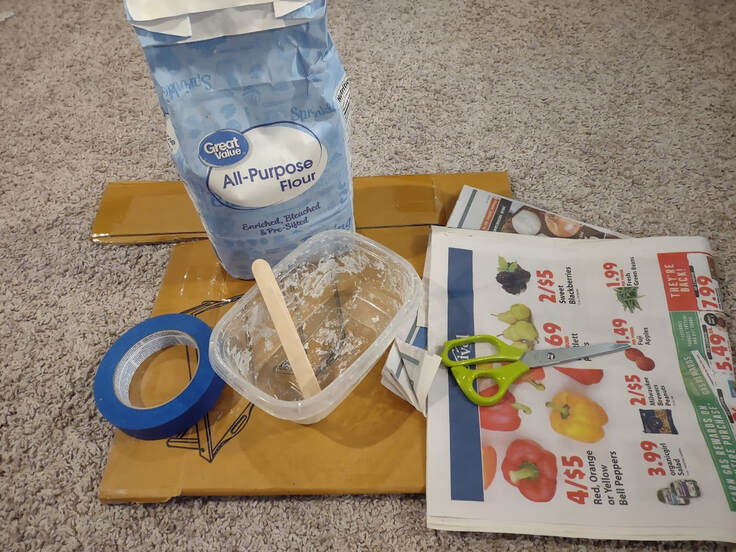
Paper Mache is something that is very easy to do at home (even if it is a little messy). All you really need is flour, water, newspaper, cardboard, and some tape! There are almost limitless possibilities to build, whether it's a fun homemade gift, a fun craft, or something to enhance your play time!
Materials
Newspaper
Cardboard
Flour
Water
Tape (Painter's Tape works best)
Container to mix
Stirring device (finger works!)
Foil (when wrapping objects you don't want to get messy)
Cardboard
Flour
Water
Tape (Painter's Tape works best)
Container to mix
Stirring device (finger works!)
Foil (when wrapping objects you don't want to get messy)
To begin, simply cut the newspaper up into thin strips - it really depends on the project on what length/size you want to cut them out into. It might be best to cut various sizes out, as sometimes a larger square can cover more area when it's a larger surface, whereas those small strips are good to work around corners, etc.
After cutting up ample strips (if you have space, it never hurts to just have a container full of strips laying around-that way as you get newspapers/ads you can cut them up and store them for when you need them!), it's time to design. If you are building a frame first, now would be the time to shape your frame to its desired shape (examples below) using cardboard/cereal boxes and tape. You may also use foil if you are going to paper mâché around an object that will not permanently be part of the project (i.e. around a bowl or a hat to make a mask).
Once your form is ready you can make the paper mâché mix. The mix is extremely simple, as its one part flour and two parts water. However big your current paper mâché-ing will be determines how much to make. Many times it works best to do it in phases (especially on larger projects as they tend to get soggy so you want to do a section/layer and then let it dry), so whatever your batch size just keep it at a 2-1 ration between water and flour (1 cup of flour is typically more than enough for one round). Simply stir the two together until there are no more floury lumps.
Having mixed it all up you are ready to apply! Either dip your clipping in the flour/water mix, or get your fingers wet and rub them along the clipping. You want to make sure the paper is pretty wet, especially when you are first starting. If you are using cardboard, it is also helpful to pre-wet the surface of the cardboard with the mixture as well, as we really want the newspaper to cling to either the surface we are putting it on, or to more newspaper. After you apply the strip of wet newspaper, smooth it out by rubbing it back and forth a few times to ensure it sticks soundly to the surface. Continue to apply wet strips until finished - depending on the structure it works best to alternative either the direction of the strips, or the size/style of strips. For larger projects you will have to do one layer at a time, otherwise your structure will get too soggy from the mixture.
The best part of paper mâché is if it dries and there are any issues, you can simply make some more paper mâché to correct/add on to it - paper mâché sticks really well to itself you so can always come back to modify your project. Once dry these are super easy to paint, or they could be colored in with crayons/markers as well (white paint is best to cover the newspaper, then add a coat of whatever color you want the end project to be).
Masks
Paper mâché masks are always a hit, and they can turn into so many things, so there's no reason to stop at just one! Traditionally, masks are made by applying the paper mâché directly to your face and then letting it dry slightly before removing, but that's not the route we are taking here as that requires a lot of patience and can of course be quite messy (if not slightly traumatizing to the child as well). Attempt to roughly size up your child's face with oval objects around the house - a baseball cap works really well. Once you found it, wrap it with foil to completely cover any piece that might get wet. You can either leave the item under the foil, or if you are careful you can pull the foil off the item and it should retain it's shape. When that's done, begin making your mask!
You can either build the eye and mouth holes while creating the mask, or you can always cut them out after it dries (scissors would work but some kind of small knife would yield the best results). if you are cutting out after if dries, apply a few strips of wet paper mâché around the edges of the cut to smooth it out - you will need to work in several layers as we need the mask to be thicker, so don't worry about having to make more paper mâché to smooth out the edges as you can cut the eyes and mouth out after the first round and then smooth it out in round two. Attempting to make the entire mask in one sitting might be possible, but oftentimes the project becomes too soggy to be able to apply layer after layer, so it's best to apply a layer or two, let it dry, then apply another lay or two.
Once the mask is done, paint with a while coat if you can, then let the kids decorate however they want - you can also get even more creative and use cardboard to make ears, etc. (make sure to paper mâché those into the mask too to seal it all nice and tight, so it's best to add those at the beginning or after the first layer).
Boat/Pirate Ship
A boat, or pirate ship depending on the style of play, is easier to make than you think! This one requires a bit of "design" prep, as you'll want to use cardboard to build the frame to make sure it can hold up to all that play, as boats are meant to move around! You can build a small or large boat based on your needs, as the shape of the boat is similar regardless of its end size (or even simpler is build a raft/canoe). The mast can just be rolled up cardboard that taped together (it works best to have the bottom not be rolled and another layer of cardboard laid over the bottom of the boat to really seal it to the boat as simply taping probably won't hold up over time). For the sail, felt works great, but a simple sheet of paper will also do the trick!
The last 2 pictures were taken 3 years after the project finished, so you can see these have the potential to hold up over time fairly well!
The last 2 pictures were taken 3 years after the project finished, so you can see these have the potential to hold up over time fairly well!
Castle
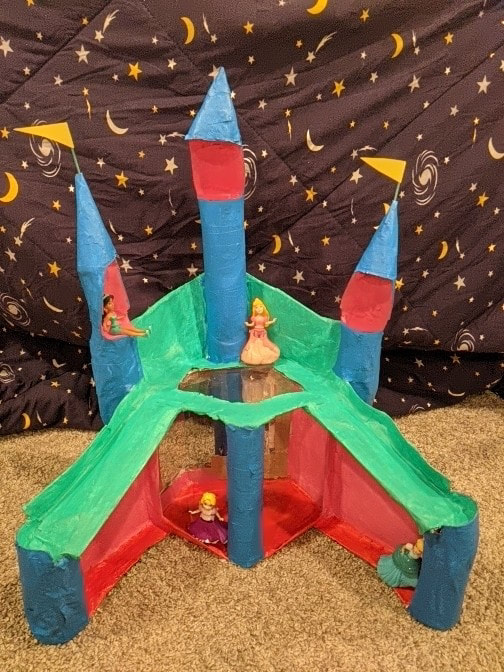
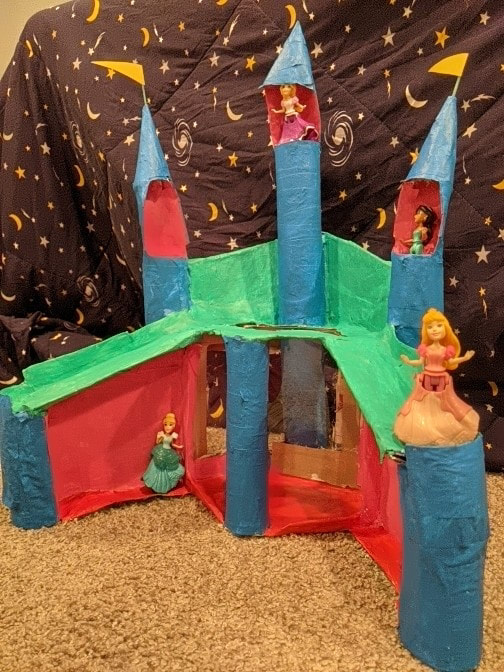
Castles are easy than one would think, as for the most part they are mainly squarish in design, so a regular shipping box works really nicely as a base starting place. In the example below a package for a toy that came with plastic viewing areas was used, along with shipping/wrapping paper rolls for the towers (using toilet paper rolls cut in half for the open tops of the tower). Using the other half of the toilet paper rolls you can twist them into tower tops, taping them down to hold them in place. For flags, toothpicks work really well with either felt or paper for the flag. As with real castles, there are many variations to try out - a bridge between boxes, a drawbridge using fishing line, even a dungeon with toothpicks/popsicle sticks as the jail cell! Castles can be build small for figurines and larger for those bigger action figures - just make sure to seal it well with several layers of paper mâché so it will last longer.


